


How to Set Up a Party Ice Bucket That Actually Keeps Drinks Cold All Night

You packed the cooler, bought two bags of ice, and by the time the burgers came off the grill your drinks were lukewarm. It's one of those hosting failures that feels small until it isn't — because warm beer at a backyard party is a mood killer nobody announces out loud, they just quietly stop drinking.
The good news: keeping drinks cold all night isn't about buying more ice. It's about setting up your bucket correctly from the start. Here's exactly how to do it.
Start With the Bucket, Not the Ice
Most people grab whatever container is handy — a plastic tub, a metal pail, a cheap foam cooler — and then wonder why the ice is gone in an hour. The container is doing most of the work here, and a thin-walled bucket sitting in direct sun on a hot patio is basically a warm bath for your drinks.
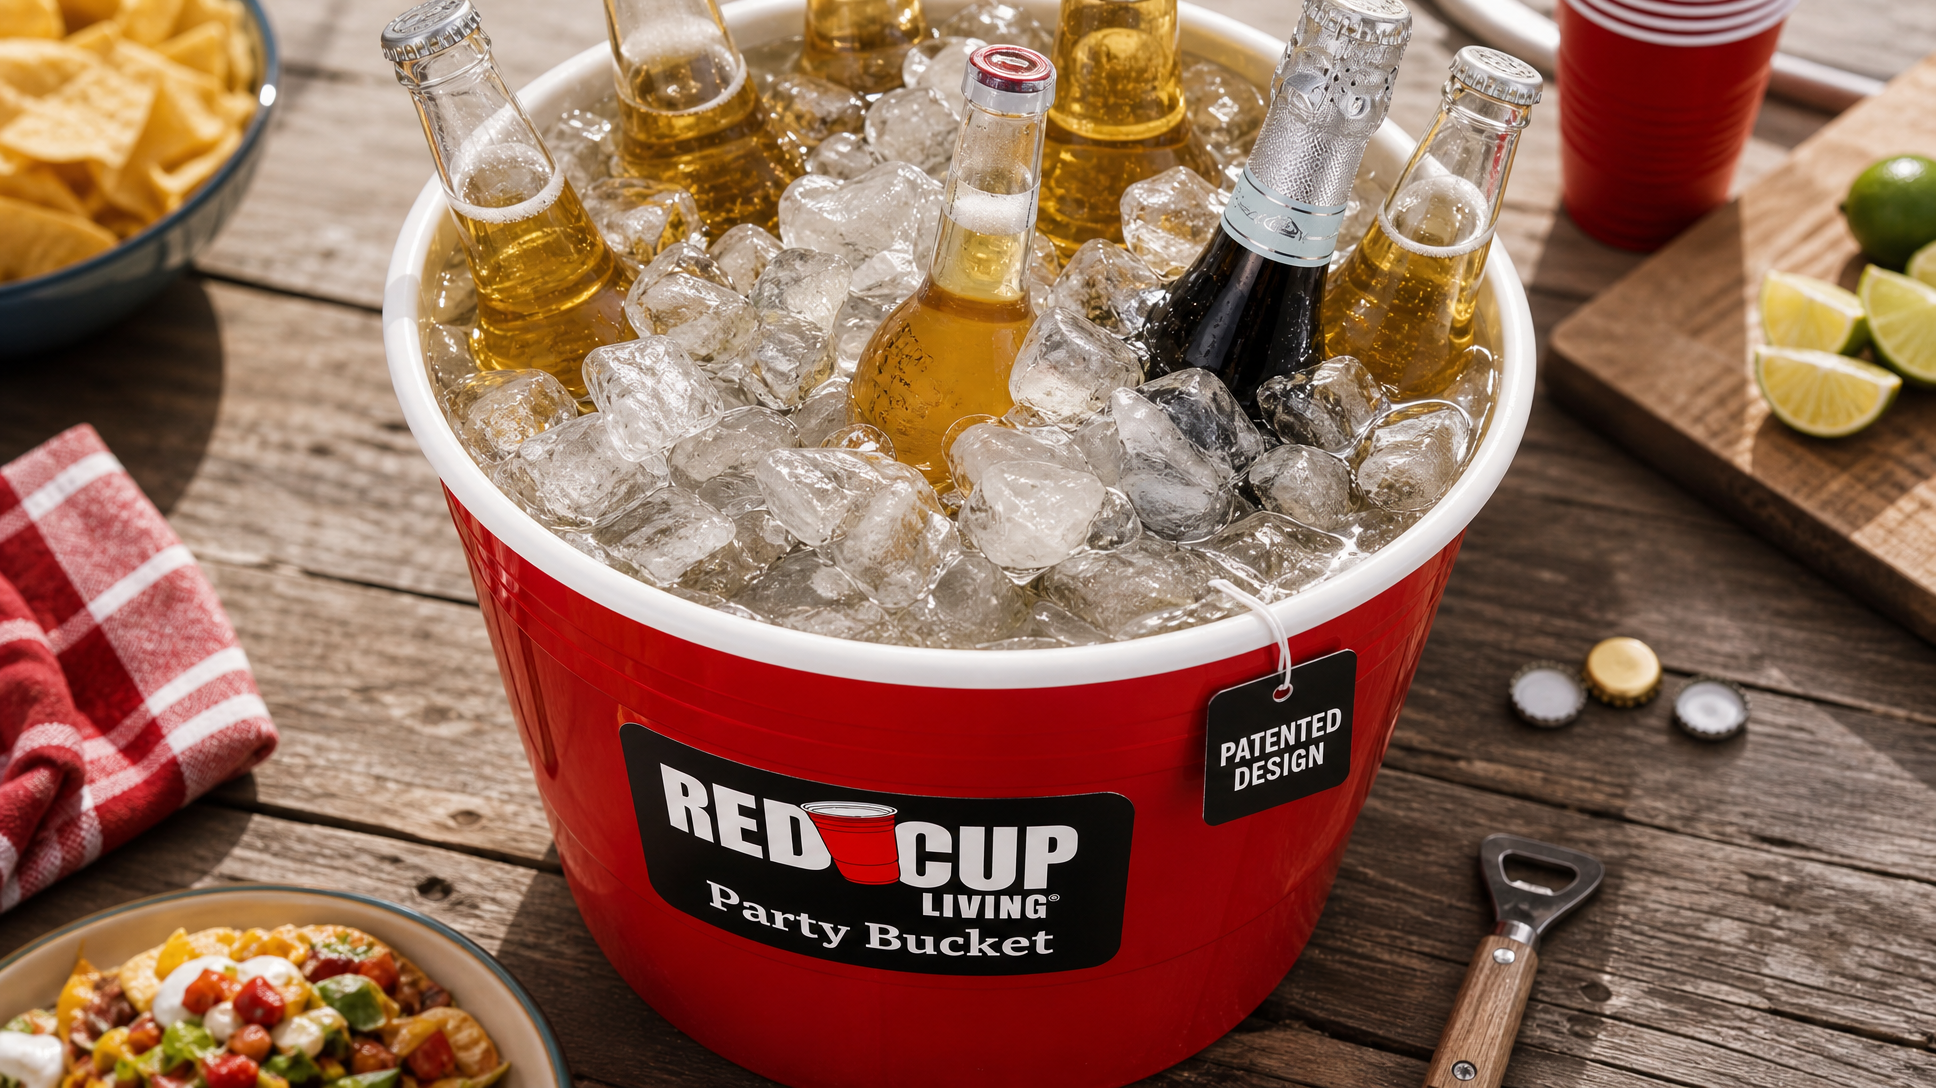
The Red Cup Living Party Bucket is built with a double-wall ABS plastic construction that insulates as it chills — meaning the cold air stays trapped inside instead of bleeding out into the summer heat. It's also break-resistant, BPA and phthalate-free, and FDA approved, so it's not just durable — it's the kind of thing you pull out at every party for years, not something you replace every season. The fact that it's shaped like a giant red solo cup is honestly just a bonus, but it's a very good bonus.
If your bucket can't hold the cold, no amount of ice technique will save you. Get that part right first.
The Pre-Chill Step Most Hosts Skip
Before you add a single cube, rinse your bucket with cold water and let it sit in the shade for a few minutes. A bucket that's been baking in the sun all afternoon will melt your first layer of ice before the party even starts. This is the single easiest thing you can do to extend your ice life, and almost nobody does it.
If you're hosting an afternoon event, move the bucket into a cool spot indoors for 20–30 minutes before setup. You're not chilling the bucket to freezing — you're just not starting at a disadvantage.
The Right Way to Layer Ice and Drinks
Here's where most setups go wrong: people put the drinks in first, then dump ice on top. That works, but it's not efficient. The better method:
- Start with a base layer of ice. Fill the bottom of the bucket with a solid layer of cubed or crushed ice — enough to lift your bottles off the bottom. This matters because the bottom of the bucket is where warmth transfers from the surface it's sitting on.
- Pack your drinks in tight. The more contact each bottle or can has with ice, the faster and longer it stays cold. Don't leave big air gaps between bottles — cold air falls, warm air rises, and gaps are just warm air pockets waiting to ruin your setup.
- Fill in around and over the top. Once your drinks are in, pour ice into every gap and pile it a few inches above the bottle necks. You want the entire drink submerged, not just the bottom half.
- Add a small amount of water. A little cold water in the mix (not a lot — just enough to fill the gaps between cubes) dramatically improves contact between the ice and the bottles. Water conducts cold far better than air does. This is the trick bartenders use in commercial ice buckets.
That last step is the one that actually changes the math on a hot afternoon. Ice-plus-water is measurably more effective at chilling than ice alone — it's basic physics, not a party hack.
Where You Put the Bucket Is Half the Battle
Direct sunlight is the enemy. Even with a well-insulated bucket and a perfect ice setup, a bucket sitting in full afternoon sun on a dark wood deck is fighting an uphill battle. Find a shaded spot — under an umbrella, near a wall, or on a surface that isn't absorbing heat all day (a folding table beats a dark patio stone).
Also: keep a lid nearby if you have one, or drape a cloth over the top between rounds. Every time someone digs through the bucket, warm air rushes in. You can't stop guests from grabbing drinks, but you can minimize the open-air exposure between grabs.
How Many Drinks Can It Actually Hold?
The Red Cup Living Party Bucket holds 201 oz of capacity — that's a serious amount of real estate for bottles and cans. For a typical backyard gathering, you can comfortably pack in enough bottles for a good-sized group without running back to the fridge every 20 minutes. It's large enough to be a centerpiece, not just a side piece.
And when the drinks are gone? It pulls double duty as a serving vessel for chips, popcorn, snacks, or even a punch bowl situation. Hosts who've used it for a few seasons tend to find it becomes the default container for almost everything at outdoor parties.
Replenishing Ice Without Wrecking Your Setup
At some point you'll need to add more ice. When you do, resist the urge to dump a whole bag on top — that displaces drinks and floods the setup. Instead, pour new ice around the edges and let it settle into the gaps. If there's standing water from melted ice, you don't necessarily need to drain it (remember: cold water helps), but if it's gotten warm, drain and refresh.
A good rule of thumb: check the bucket every hour or so during a long outdoor event. A quick top-off is far easier than a full reset.
One More Thing: Clean-Up Is Part of the Setup
The Party Bucket is dishwasher safe, which means the post-party cleanup isn't an event in itself. Rinse it out, run it through the dishwasher, and it's ready for the next one. That's the whole point of switching from disposable — it should be easier, not harder, to use the better thing.
If you're still using a flimsy plastic tub or a foam cooler that cracks every other season, you're spending more on replacements than you think. A bucket that lasts years and holds its cold is a straightforward upgrade.
Ready to stop watching your ice melt? Shop the Red Cup Living Party Bucket — built to keep the cold in and the party going.
Frequently Asked Questions
How long will ice last in the Red Cup Living Party Bucket?
The double-wall insulated construction is designed to keep drinks cold for hours — exact timing depends on ambient temperature, sun exposure, how often the bucket is opened, and the ice-to-water ratio inside. Following the layering and shading tips in this guide will get you the most out of it.
Is the Party Bucket safe for food as well as drinks?
Yes. It's BPA and phthalate-free and FDA approved, so it's safe for both beverages and food. Hosts regularly use it for chips, popcorn, snacks, and appetizers when it's not on ice duty.
Can I use crushed ice instead of cubed ice in the bucket?
Crushed ice actually works well because it fills gaps more efficiently and creates more surface contact with bottles — which means faster initial chilling. The trade-off is that it melts a bit faster than large cubes. For a long event, a mix of larger cubes on the bottom and crushed ice packed around the bottles is a solid approach.
Is the Party Bucket dishwasher safe?
Yes, it's dishwasher safe. That's one of the practical reasons to switch from disposable or flimsy alternatives — cleanup is quick, and the bucket stays in good shape for many uses to come.